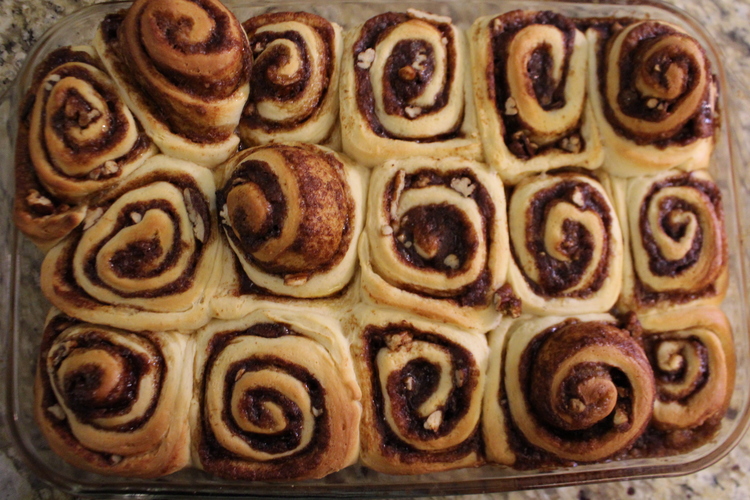
Cinnamon Rolls

Oh boy do I have something good for you. Cinnamon rolls. Really good cinnamon rolls. Now, I'm going to be honest with you. I've never made something with yeast before on my own. There I said it. It's out on the table, and I feel like we're closer now that I've been honest with you.

That being said, if you've never made something with yeast before it's not as scary as you may think. I'm all about overcoming fears and dealing with new and exciting things, and yes, yeast is an exciting thing. It brings us bread, which in my opinion is gold that has fallen from the skies and has been kissed by actual angel lips. So how could yeast not be exciting?

At first, during the proofing stage, you'll be filled with self doubt. But have no fear! It will be OK. I promise. After an hour or so, and if you've followed the directions (like you should) you will reveal your perfectly proofed bread dough, and then at some point you will create with your own beautiful hands cinnamon rolls. You can do it. I believe in you.

I added pecans into my cinnamon rolls because a little added protein never hurt anyone. If you like pecans it highly suggest the addition.

I stumbled upon this recipe on The Girl Who Ate Everything's blog. Grab your yeast, and get proofing, because these cinnamon rolls will be gone before you know it.

print recipe
Cinnamon Rolls
Ingredients
  • 1 package Active Dry Yeast
  • 1 cup warm milk
  • 1/2 cup sugar
  • 1/3 cup butter, melted
  • 1 tsp salt
  • 2 eggs
  • 4-1/2 cups bread flour
  • FILLING:
  • 1 cup brown sugar, packed
  • 2-1/2 tbsp ground cinnamon
  • 1/3 cup butter, softened
  • 1 cup roughly chopped pecans
  • ICING:
  • 3 oz. cream cheese
  • 4 tbsp butter, softened
  • 1-1/2 cups powdered sugar
  • 1/2 tsp vanilla extract
  • 1/8 tsp salt
Instructions
1. Microwave milk for 40-60 seconds or until it is about 110ºF in temperature. Dissolve yeast in the milk. In the bowl of a stand mixer with a dough hook attachment, add the dissolved yeast mixture, and the sugar, butter, salt, eggs, and flour. Mix until the dough forms a ball. You can continue to knead the dough for several minutes in the stand mixer or with your hands on a clean surface. 2. Put dough in large bowl that has been sprayed with cooking spray and cover it with plastic wrap. Let the dough rise in a warm place for an hour or until it has doubled in size. I put the dough in my microwave with a bowl of hot water to let the steam from the water create a warm, damp environment for the dough. If you choose to do this warm water up in the microwave before placing the dough inside. Do not turn microwave on while dough is inside. 3. Once the dough has doubled in size you can begin to mix the filling. In a small bowl, combine the brown sugar and cinnamon. Sprinkle flour onto clean counter surface and roll the dough out to a 16x21in rectangle, about 1/4in thick. Spread the softened butter on the surface of the dough, and sprinkle evenly with the brown sugar cinnamon mixture. Add pecans to taste. Roll the dough up starting at the longer side. Cut the dough into even sizes. I got 16 rolls out of my log, but anywhere from 12-18 is good as long as they are the same size. Place the rolls in a lightly greased 9x13in baking dish. 4. Cover the rolls and let rise again until they are doubled in size. I did the same technique of warming up a bowl of water in the microwave and placing the rolls inside the microwave with the bowl. 5. Preheat oven to 350º F. Bake rolls for 18-20 minutes or until golden brown.6. While the rolls are in the oven begin to make the icing. Beat together cream cheese, butter, powdered sugar, vanilla, and salt until combined. When the rolls come out of the oven spread the frosting on them while they're still hot. The icing will melt all over the rolls.
Details
Prep time: Cook time: Total time: Yield: 12-18 Rolls

Chocolate Salted Caramel Thumbprint Cookies

It's no secret that another one of my favorite flavor combinations is salted caramel, as apparent by one of my past posts. There's something about the salty sweet that draws me in, and in these cookies, with the additions of chocolate and pecans, all is right in the world.

They're tiny little things, so I don't feel too guilty eating a couple, and pecans are added protein so they're kind of healthy. Right? No? Well, let me just live in my own world where cookies are healthy, because if eating cookies are wrong I don't want to be right.

I adapted this recipe from Taste of Home, and boy, am I glad I did. These cookies make me happy, so if you're feeling a bit down make these. They'll put a smile on your face and undoubtedly a smile on your tummy.

print recipe
Chocolate Salted Caramel Thumbprint Cookies
Ingredients
  • 1/2 cup butter, softened
  • 2/3 cup sugar
  • 1 egg, separated
  • 2 tbsp milk
  • 1 tsp vanilla extract
  • 1 cup all-purpose flour
  • 1/3 cup baking cocoa
  • 1/2 tsp salt
  • 1 cup finely chopped pecans
  • 12 to 14 caramels
  • 3 tbsp heavy whipping cream
  • Sea salt for sprinkling
Instructions
1. In a large bowl, cream butter and sugar until light and fluffy. Beat in egg yolk, milk and vanilla. In another bowl, whisk flour, cocoa and salt; gradually beat into creamed mixture. Refrigerate, covered, 1 hour or until you can easily roll it into balls.2. Preheat oven to 350°. Shape dough into 1-in. balls. In a bowl, beat egg white. Place pecans in a separate bowl. Dip balls in egg white, then in pecans, patting to help pecans adhere to the dough.3. Press a deep indentation in center of each with the end of a wooden spoon handle. Bake 10-12 minutes or until set. Remove from pans to wire racks to cool. When I took them out of the oven I used the wooden spoon again to make the thumbprint deeper.4. In a large heavy saucepan, melt caramels with cream over low heat; stir until smooth. Fill each cookie with about 1/2 teaspoon caramel mixture. Sprinkle each top with a bit of sea salt to taste.
Details
Prep time: Cook time: Total time: Yield: 24 cookies

Classic Crème Brûlèe

I think a lot of people are scared of crème brûlèe. I get it. Custard can be temperamental, and the creation of that delicious sugar crust can be a bit overwhelming. Yet, my inner pyro, and your inner pyro should tell you differently. 

How often do you get to play with a blow torch? Let me rephrase that. How often do you get to play with a blow torch when you know a heavenly, sugary, dessert will be waiting for you at the end of your adventure.

I can assure you that crème brûlèe isn't scary. If you get all the individual steps right it'll result in the perfect crème brûlèe. I will say that I recommend you grab yourself a blow torch. You can find a decently priced one at any hardware store. Think of it as an investment because once you make this crème brûlèe, you will want to make it again, and again, and again. 

This recipe is simple. Simply delightful. My father and I made it together, and it was so good that my dad was licking the ramekin to get all the extra custard. Not an exaggeration.

print recipe
Classic Crème Brûlèe
Ingredients
  • 8 egg yolks
  • 1/3 cup granulated white sugar
  • 2 cups heavy cream
  • 1 tsp vanilla extract
  • 1/4 cup granulated white sugar (for the carmelized tops)
Instructions
1. Preheat oven to 300º F.2. In a large bowl, whisk together egg yolks and sugar until the sugar has dissolved and the mixture is thick and pale yellow. Add cream and vanilla, and continue to whisk until well blended. 3. Heat a pot of water on the stove until it starts to boil. This will provide the water bath for the custard. Place the empty ramekins in a pan. Fill the six ramekins equally with the custard mixture. Pour the hot water around the ramekins. You want enough water to come up the sides of the ramekins. 4. Bake the custard for 40 to 50 minutes. The custard should be set around the edges, but still loose in the center. Remove from the oven and leave in the water bath until cooled. Remove from the water bath and let cool completely in the fridge for at least 2 hours.5. When ready to serve, sprinkle about 2 teaspoons of sugar over each custard. Use a blow torch to melt sugar, and to create the crust. If you don't have a blow torch, you can also place the custards back in the oven under the broiler, but torches work best.
Details
Prep time: Cook time: Total time: Yield: 6 ramekins